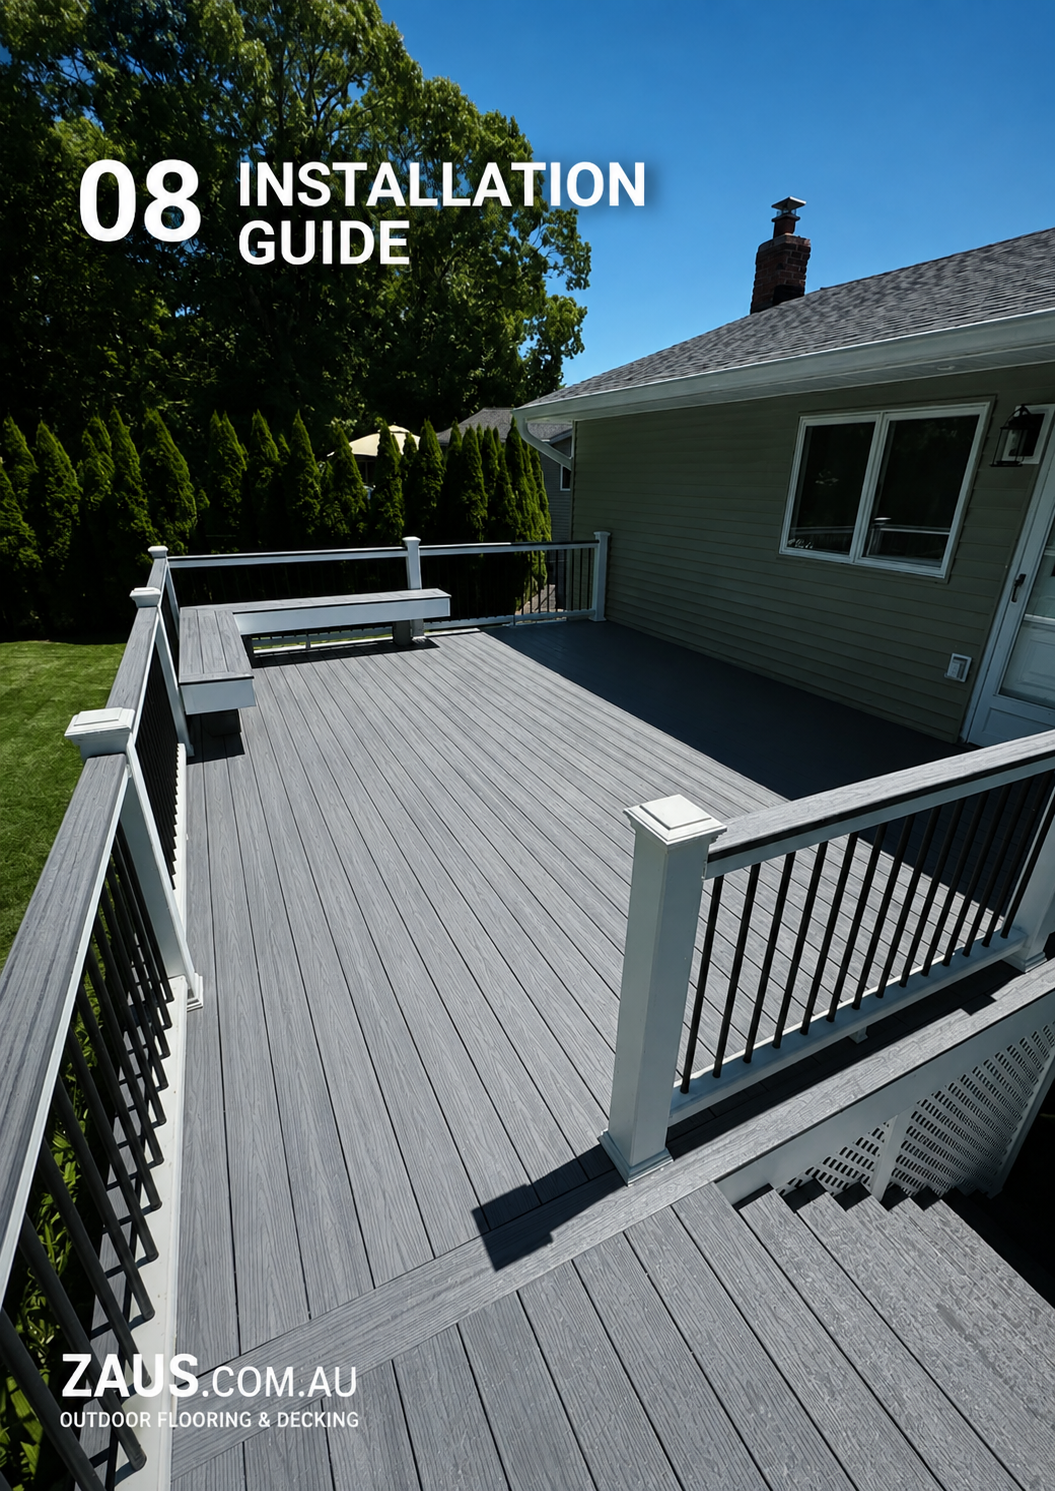

Installation Guide
Professional installation guidance for concealed-fix composite and WPC outdoor decking systems.
ZAUS Outdoor Decking Installation provides a coordinated installation approach for composite and WPC decking, covering substrate preparation, joist positioning, board spacing, concealed fixing and perimeter finishing requirements.
Correct preparation of the supporting structure is critical to the stability and finished appearance of the decking. Joists must be installed level and at the required centres before boards are fixed, with appropriate clearances maintained between boards, adjoining structures and board-end joints.
The following requirements provide the general installation parameters for the documented concealed clip and joist system. Final requirements should always be confirmed against the selected decking profile and fixing system before installation.
Substrate Preparation
The supporting substrate must provide a stable and sufficiently level base for the decking subframe.
Installation requirements include:
Concrete base minimum 60 mm thickness
Finished level tolerance less than 5 mm
Soft or unstable ground requires a suitable solid substrate before installation
Supporting surface should be checked and prepared before joists are positioned
Drainage and surrounding site conditions should be considered before installation
The supporting structure should not be used to compensate for an inadequately prepared substrate.
Joist Installation
Joists form the supporting structure beneath the decking boards and must be correctly positioned before board installation begins.
The documented system requires:
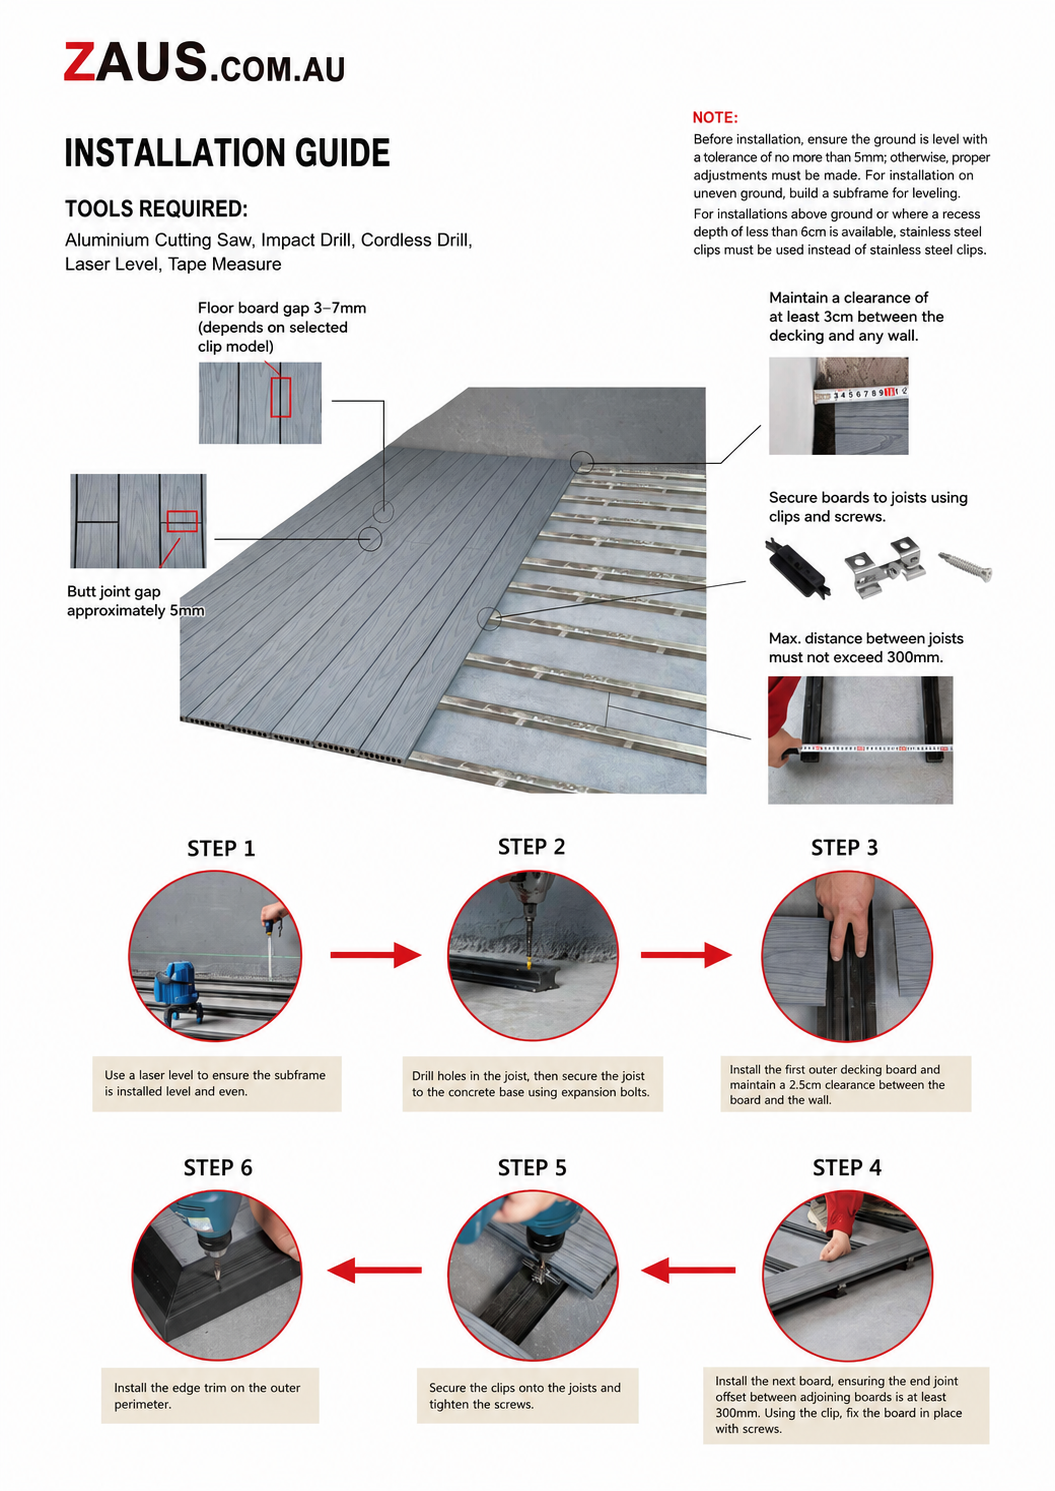
Maximum joist centres of 300 mm
Joists installed level before decking installation
Secure fixing of joists to the supporting substrate
Appropriate support at board ends and joints
Additional joists where required by adjoining board ends
Expansion bolts and suitable galvanised or stainless steel fixings can be used according to the applicable substrate and installation configuration.
Board End Joints
Where two decking boards meet end-to-end, each adjoining board end should receive appropriate independent support.
The documented installation method uses two supporting joists at adjoining board ends, with approximately 25 mm between the two joists.
This allows each board end to be correctly supported and fixed rather than relying on a single shared joist.
An approximate 5 mm gap should be maintained between adjoining board ends.
Board Spacing
Correct spacing allows for movement and helps maintain consistent drainage and ventilation between decking boards.
Depending on the selected clip system, documented board spacing is approximately:
3–7 mm between decking boards
Approximately 5 mm at board end joints
Minimum 30 mm clearance from adjoining walls
Final spacing should be confirmed according to the selected board profile, clip system and manufacturer installation requirements.
Concealed Fixing System
The decking uses a concealed clip fixing method designed to secure boards through the board edges rather than through the primary visible surface.
The installation system can incorporate:
Starter clips
Concealed decking clips
Galvanised screws
Stainless steel screws
Expansion bolts
Supporting joists
Starter clips establish the first board position before concealed clips are progressively installed between subsequent boards.
The selected clip determines the required spacing between adjoining decking boards.
Perimeter & Wall Clearances
Decking should not be installed directly against surrounding walls or structures.
The documented installation system requires a minimum 30 mm wall clearance.
Required clearances should be maintained around applicable perimeter conditions to accommodate the installation system and expected board movement.
Installation Sequence
A typical installation sequence can incorporate:
Prepare Substrate • Establish Finished Levels • Set Out Joists • Fix & Level Joist Structure • Install Starter Clips • Position First Decking Board • Install Concealed Clips • Continue Decking Installation • Support Board-End Joints • Maintain Required Gaps • Complete Perimeter Details • Final Inspection
Board alignment and spacing should be checked progressively throughout installation rather than corrected only after the decking area has been completed.
Required Tools
Installation can require:
Aluminium cutting saw
Impact drill
Cordless drill
Laser level
Tape measure
Additional tools and equipment may be required according to the site conditions, substrate and selected decking system.
Fixings & Components
The documented installation system can incorporate:
Galvanised screws
Stainless steel screws
Expansion bolts
Starter clips
Concealed decking clips
Supporting joists
Fixings should be selected according to the installation environment, supporting substrate and applicable decking system.
Key Installation Requirements
The principal documented installation parameters are:
Maximum joist centres: 300 mm
Board spacing: 3–7 mm depending on clip system
Minimum wall clearance: 30 mm
Board end-joint gap: approximately 5 mm
Double joist support at adjoining board ends
Approximate spacing between double joists: 25 mm
Minimum concrete base thickness: 60 mm
Level tolerance: less than 5 mm
Supporting joists must be level before board installation
Soft ground requires a suitable solid supporting substrate
These requirements should be considered together rather than independently when setting out the decking system.
Project Coordination
ZAUS coordinates outdoor decking as a complete project flooring package, allowing the decking profile, subframe, fixing system, quantities and installation requirements to be considered together.
The process can incorporate:
Review Decking Area • Confirm Substrate • Select Decking Profile • Confirm Joist Layout • Determine Board Direction • Confirm Fixing System • Establish Perimeter Clearances • Calculate Materials • Prepare Substrate • Install Subframe • Install Decking • Complete Finishing Details
Final installation requirements, fixing methods and dimensions should be confirmed against the selected decking product, manufacturer-supported installation system and actual site conditions before installation.
Applications
Residential Decking • Balconies • Terraces • Courtyards • Pool Surrounds • Rooftop Areas • Outdoor Entertaining Areas • Multi-Residential Developments • Hospitality • Selected Commercial Outdoor Areas
Prepare. Set Out. Fix. Finish.
ZAUS Outdoor Decking Installation is developed around correct substrate preparation, accurate joist positioning, controlled board spacing and concealed fixing.
Prepare the Base • Level the Joists • Maintain Required Centres • Support Board Joints • Maintain Clearances • Conceal the Fixings • Complete the Perimeter
The result is a properly supported and professionally finished composite decking installation developed around the requirements of the selected ZAUS outdoor decking system.
Professional installation guidance for concealed-fix composite and WPC outdoor decking systems.
ZAUS Outdoor Decking Installation provides a coordinated installation approach for composite and WPC decking, covering substrate preparation, joist positioning, board spacing, concealed fixing and perimeter finishing requirements.
Correct preparation of the supporting structure is critical to the stability and finished appearance of the decking. Joists must be installed level and at the required centres before boards are fixed, with appropriate clearances maintained between boards, adjoining structures and board-end joints.
The following requirements provide the general installation parameters for the documented concealed clip and joist system. Final requirements should always be confirmed against the selected decking profile and fixing system before installation.
Substrate Preparation
The supporting substrate must provide a stable and sufficiently level base for the decking subframe.
Installation requirements include:
Concrete base minimum 60 mm thickness
Finished level tolerance less than 5 mm
Soft or unstable ground requires a suitable solid substrate before installation
Supporting surface should be checked and prepared before joists are positioned
Drainage and surrounding site conditions should be considered before installation
The supporting structure should not be used to compensate for an inadequately prepared substrate.
Joist Installation
Joists form the supporting structure beneath the decking boards and must be correctly positioned before board installation begins.
The documented system requires:
Maximum joist centres of 300 mm
Joists installed level before decking installation
Secure fixing of joists to the supporting substrate
Appropriate support at board ends and joints
Additional joists where required by adjoining board ends
Expansion bolts and suitable galvanised or stainless steel fixings can be used according to the applicable substrate and installation configuration.
Board End Joints
Where two decking boards meet end-to-end, each adjoining board end should receive appropriate independent support.
The documented installation method uses two supporting joists at adjoining board ends, with approximately 25 mm between the two joists.
This allows each board end to be correctly supported and fixed rather than relying on a single shared joist.
An approximate 5 mm gap should be maintained between adjoining board ends.
Board Spacing
Correct spacing allows for movement and helps maintain consistent drainage and ventilation between decking boards.
Depending on the selected clip system, documented board spacing is approximately:
3–7 mm between decking boards
Approximately 5 mm at board end joints
Minimum 30 mm clearance from adjoining walls
Final spacing should be confirmed according to the selected board profile, clip system and manufacturer installation requirements.
Concealed Fixing System
The decking uses a concealed clip fixing method designed to secure boards through the board edges rather than through the primary visible surface.
The installation system can incorporate:
Starter clips
Concealed decking clips
Galvanised screws
Stainless steel screws
Expansion bolts
Supporting joists
Starter clips establish the first board position before concealed clips are progressively installed between subsequent boards.
The selected clip determines the required spacing between adjoining decking boards.
Perimeter & Wall Clearances
Decking should not be installed directly against surrounding walls or structures.
The documented installation system requires a minimum 30 mm wall clearance.
Required clearances should be maintained around applicable perimeter conditions to accommodate the installation system and expected board movement.
Installation Sequence
A typical installation sequence can incorporate:
Prepare Substrate • Establish Finished Levels • Set Out Joists • Fix & Level Joist Structure • Install Starter Clips • Position First Decking Board • Install Concealed Clips • Continue Decking Installation • Support Board-End Joints • Maintain Required Gaps • Complete Perimeter Details • Final Inspection
Board alignment and spacing should be checked progressively throughout installation rather than corrected only after the decking area has been completed.
Required Tools
Installation can require:
Aluminium cutting saw
Impact drill
Cordless drill
Laser level
Tape measure
Additional tools and equipment may be required according to the site conditions, substrate and selected decking system.
Fixings & Components
The documented installation system can incorporate:
Galvanised screws
Stainless steel screws
Expansion bolts
Starter clips
Concealed decking clips
Supporting joists
Fixings should be selected according to the installation environment, supporting substrate and applicable decking system.
Key Installation Requirements
The principal documented installation parameters are:
Maximum joist centres: 300 mm
Board spacing: 3–7 mm depending on clip system
Minimum wall clearance: 30 mm
Board end-joint gap: approximately 5 mm
Double joist support at adjoining board ends
Approximate spacing between double joists: 25 mm
Minimum concrete base thickness: 60 mm
Level tolerance: less than 5 mm
Supporting joists must be level before board installation
Soft ground requires a suitable solid supporting substrate
These requirements should be considered together rather than independently when setting out the decking system.
Project Coordination
ZAUS coordinates outdoor decking as a complete project flooring package, allowing the decking profile, subframe, fixing system, quantities and installation requirements to be considered together.
The process can incorporate:
Review Decking Area • Confirm Substrate • Select Decking Profile • Confirm Joist Layout • Determine Board Direction • Confirm Fixing System • Establish Perimeter Clearances • Calculate Materials • Prepare Substrate • Install Subframe • Install Decking • Complete Finishing Details
Final installation requirements, fixing methods and dimensions should be confirmed against the selected decking product, manufacturer-supported installation system and actual site conditions before installation.
Applications
Residential Decking • Balconies • Terraces • Courtyards • Pool Surrounds • Rooftop Areas • Outdoor Entertaining Areas • Multi-Residential Developments • Hospitality • Selected Commercial Outdoor Areas
Prepare. Set Out. Fix. Finish.
ZAUS Outdoor Decking Installation is developed around correct substrate preparation, accurate joist positioning, controlled board spacing and concealed fixing.
Prepare the Base • Level the Joists • Maintain Required Centres • Support Board Joints • Maintain Clearances • Conceal the Fixings • Complete the Perimeter
The result is a properly supported and professionally finished composite decking installation developed around the requirements of the selected ZAUS outdoor decking system.